Hey everyone, it’s John, welcome to my recipe page. Today, we’re going to prepare a distinctive dish, dried mint paratha. One of my favorites. This time, I am going to make it a little bit unique. This is gonna smell and look delicious.
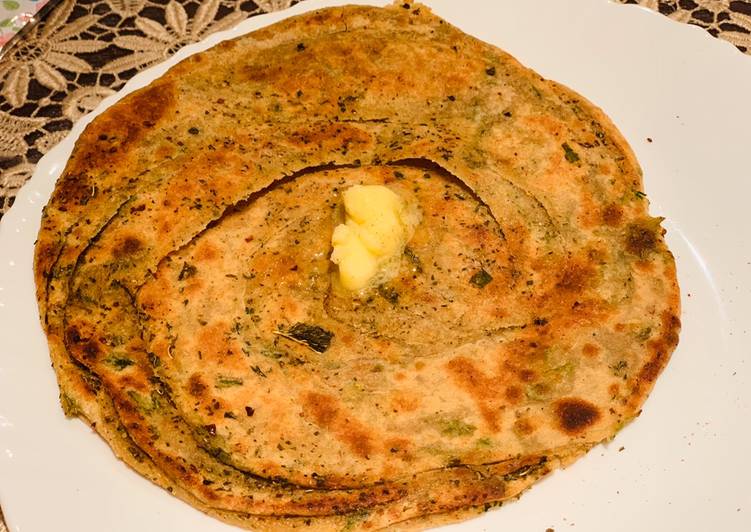
Pudina Paratha as the name suggests is made using whole wheat flour which is later flavored with mint powder or kasuri methi powder. The flavor of pudina or say mint powder is so refreshing that you would regret for not using dried mint powder in your paratha recipes before. Sprinkle some dried mint on top and serve mint paratha hot with any Indian curry.
Dried Mint Paratha is one of the most popular of current trending meals in the world. It’s appreciated by millions every day. It is easy, it’s quick, it tastes yummy. They’re fine and they look fantastic. Dried Mint Paratha is something which I’ve loved my whole life.
To begin with this particular recipe, we must first prepare a few components. You can cook dried mint paratha using 14 ingredients and 15 steps. Here is how you can achieve it.
The ingredients needed to make Dried Mint Paratha:
- Prepare For paratha dough
- Make ready 20 g fresh mint, finely chopped
- Take 120 g wholewheat flour
- Make ready 1 tbsp melted ghee
- Prepare 1/2 tsp salt
- Get As needed water
- Prepare For the Filling
- Get 2 tsp ground cumin
- Prepare 1 tsp ground fennel
- Prepare 1 tsp dried chilli flakes
- Get 2 tbsp chaat masala
- Take 5 g dried mint
- Get 1 tsp Himalayan salt
- Prepare 100 g ghee, for cooking
The taste and texture of these mint paratha is just superb. This is kind of lachha paratha. We are applying spiced oil mixture before pleating. So the spices give really good taste and flavor.
Instructions to make Dried Mint Paratha:
- Take the flour and salt into a mixing bowl, add the chopped mint and mix through.
- Add the melted ghee and enough water to bring the dough together.
- Mix with your hands until you have a firm dough and clean bowl. - Wrap in cling film and leave to rest for 30 minutes.
- Meanwhile make the filling by mixing all of the dry ingredients together, and warming the ghee to melt it
- When the dough has rested divide it into four balls. Keep the remaining balls covered while you work with one at a time. - Dust the dough ball in flour and roll it out.
- Brush liberally with melted ghee, then sprinkle over 1 tsp of the filling mix.
- Fold the top edge of the disc over by 2cm, then gently lift the edge and fold again in a pleat, keeping the first fold on the top. - Continue until the whole disc is folded in pleats, like a fan.
- Roll the pleat up lengthways in a tight snail shape, and squash the loose end so that it sticks to the roll.
- Cover the rolls as you make them and continue until you’ve used up all of the balls, then roll each one out into a thick paratha shape, around 15-20cm across.
- Leave the paratha in the fridge, separated with kitchen towel and covered in cling film, until you are ready to cook them.
- Heat up your chapati pan or flat frying pan. - Brush with melted ghee then add the first paratha.
- Cook for 30 seconds then flip it over and brush it with more melted ghee.
- Keep flipping and brushing with ghee until it’s evenly cooked and very crispy, pressing down with a spatula to get maximum contact on the hot pan.
- When cooked, remove the paratha to a tray and squeeze with your hands to break up some of the flaky layers.
- Sprinkle the remaining filling spices over the paratha, and serve hot, with daal and pickle.
While oil between the layers makes it flaky and crispy. The restaurant people use the dried mint leaves. Also this is nice way to preserve mint, instead of make it go waste. You can keep mint as dried herb and use it in this way in mint paratha. Also can use it in pakoras for an excellent flavour.
So that’s going to wrap it up for this exceptional food dried mint paratha recipe. Thanks so much for reading. I am confident that you can make this at home. There is gonna be more interesting food in home recipes coming up. Don’t forget to bookmark this page on your browser, and share it to your loved ones, friends and colleague. Thanks again for reading. Go on get cooking!